How to Paint celling
If the mere thought of painting the ceiling makes your neck hurt, we hear you. But it’s a necessary step to make a freshly painted room look complete. To ensure the process is as easy and pain-free as possible, follow these tips to get the job done fast and efficiently. From starting with the correct supplies to adopting the best technique, here’s how to paint a ceiling the right way.
Tips for Painting a Ceiling
Use Ceiling Paint
Ceiling paint is formulated differently than wall paint. Ceiling paint’s thicker and stickier formulation is meant to eliminate most drips.
Correctly Size the Paint Roller
Ceiling paint is best applied using a roller cover with a 3/8-inch nap if painting a smooth ceiling and a thicker nap for textured ceilings. Painting over your head is made easier when you use the right size nap roller cover. Thick-nap roller covers pick up more paint than is necessary, creating more weight on the end of the pole. Not only that but thicker nap rollers are more difficult to roll across the ceiling.
Which Color to Use for Painting a Ceiling
Flat or matte white ceiling paint is the most popular type of paint for a few significant reasons:
Flat and matte paint hides imperfections on the ceiling more than satin or glossy finishes that highlight every flaw on the surface.
The white bounces and reflects more light in the room resulting in a brighter space.
White ceiling paint provides a limitless vista for your eyes that gives the illusion that the room is larger than it is, whereas a colored ceiling offers the illusion of a smaller space.
Paint Ceiling First or Walls First?
If you are painting the entire room, it often doesn’t matter if you paint your ceiling before or after your walls. Regardless of which order you paint a room, you will inevitably drip or splatter a little bit of ceiling paint on the walls or wall paint on the ceiling that will need touching up.
Generally, it’s best to paint the ceiling first. Since the ceiling color is white, any extra paint that ends up on the walls will be covered over with wall paint, which usually is some type of color darker than white.
How to Paint celling
Prepare the Room
Remove as much furniture from the room as possible. Lay down paper or canvas drop cloths on the floor. Lay drop cloths or plastic sheeting on top of furnishings left in the room. The best way to know how much covering to lay down is to assume that every flat surface below the ceiling potentially could be dripped on.
Apply Painter’s Tape
If you’re only painting the ceiling, start by taping off the edge of the wall or crown molding. Consider using a wider painter’s tape, which will let you get the roller close to the corner without getting paint on the wall. This allows you to be less precise, so you can work faster.
Also, remember to tape around any light fixtures or vents and cover ceiling fans.
Cover Everything
Sometimes, what slows down a paint project isn’t the painting itself but the cleanup afterward. Save yourself the headache by removing as much furniture as possible from the room and covering anything that remains with plastic tarps.
Paint the Perimeter
Similar to painting a wall, you’ll want to start by “cutting in,” or using a paintbrush to paint around the perimeter of the ceiling. Using a 2- to 3-inch brush, start at the edge of the ceiling and paint into the ceiling a few inches. You’ll want to feather the strokes so the edge will blend in seamlessly once you use a roller to paint the rest of the ceiling. If you’re planning to paint the ceiling and the walls, skip the painter’s tape, and cut in on both the ceiling and the wall as you work your way around the perimeter of the room.
To make cutting in easier, make sure you’re using the appropriate ladder for the ceiling height. Straining to reach is not only dangerous, but it will likely result in sore muscles the next day. Pour some paint into a small bucket to keep at the top of the ladder rather than attempting to bring the entire can, which is not only heavy but could cause disaster if it spills.
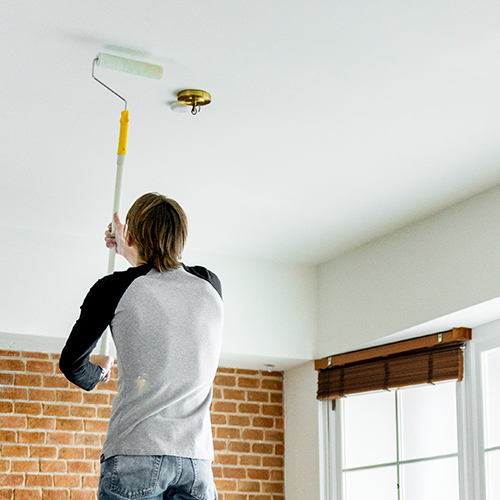
Grab a Roller
For smooth ceilings, a low-nap roller works well; for textured ceilings, try a 3/4-inch nap roller. When you’re shopping for supplies, keep the ceiling height in mind and get the shortest roller extension pole that allows you to reach comfortably. Getting too long of an extension pole means you’ll be carrying more weight than is necessary.
Roll into the paint, and then use the textured side of the paint tray to roll off any excess. It may seem that more paint would help get the job done faster, but it will cause more drips and splatters.
Starting in one corner of the ceiling, roll on the paint with overlapping strokes to create a smooth, uniform surface. Once the entire ceiling is done, allow the paint to dry for 30 minutes. Then check if the surface needs any touchups or a second coat.
Leave a Reply