How to paint by a roller
Using a paint roller is a quick way to modify the interior and exterior walls of your home. While paint brushes might seem like the easier choice, you will actually save yourself a lot of time by opting for a paint roller instead. Paint rollers will cover a larger surface area than a paintbrush and will provide an equally smooth finish to large and small areas. Before you begin rolling on paint, you need to purchase the right type of roller for the job and learn how to apply the paint effectively. Otherwise, you may end up with a streaky or splotchy finish.
How to paint by a roller
Choosing a Paint Roller
Buy a paint roller with a solid metal frame for reusability. Look for paint rollers that have small teeth or prongs that will grip the roller sleeve when applied. The teeth will keep the sleeve from rotating or falling off while you paint.
Roller Length
When shopping for supplies, you will notice there are different lengths of paint rollers to choose from. The length that you’ll need will depend on the size of the area that you’re looking to paint.
The standard length for a roller is nine inches, but for smaller areas, 4-inch and 7-inch rollers are also available. For large-area projects, like painting walls and floors, 14- and 18-inch rollers can also be purchased. If you’re painting walls or other high areas, you can add an extension pole to the roller to help you reach the tops and corners of walls without needing a ladder.
Remember to Tape
Even if you’re a very skilled painter, we recommend using high-quality painter’s tape on areas that you want to keep clean. In case of splatters, painter’s tape will help protect your baseboards, door frames, windowsills, ceiling moldings, wainscoting, light switches or any other areas of the room that you apply it to.
Prepare the Edges
When painting with a roller, it is not possible to bring the paint directly against an edge and achieve a razor-sharp line. Instead, you will need to edge the paint ahead of rolling.
One method is to use a paint edger: a small tool meant just for painting along an edge. Another method is to run painter’s tape along the surface that will not be painted. Paint goes on the adjacent surface only, with the tape protecting the other surface from paint. Finally, if you have a steady hand, you may wish to cut-in the paint with a tapered brush designed specifically for the job.
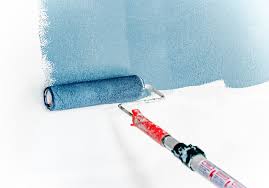
Using a paint roller
De-fuzz new roller sleeves prior to use by washing them in water for use with water-based paints.
Pour paint into the reservoir at the end of the roller tray. Do not overfill. Dip the roller lightly into the paint, the paint should cover less than half of the roller. Then roll it backward and forwards on the ramp of the tray to evenly distribute the paint on the roller cover. Roll the paint onto the surface in a large zigzag pattern. Then fill in the space with criss-cross strokes.
Once you’ve covered the area, level the finish by laying off with long, parallel strokes. Laying off needs to be done before the paint has commenced drying, so it’s best to work in sections at a time.
Leave a Reply